I did some digging around in my Vimeo page today and I’ve found some old gems!
Here is a Auto rigger demo from a T-Rex rig I built back in 2013.
Maya
Getting back to the shoulders.
I recently found time to get into some improvements in my rigging system.
For the longest time I’ve not paid much attention to a characters scapular, often finding that it is off screen or required at all.
But with Games technology improving and limits on bone count and poly count increasing I find my self with the opportunity to include some extra deformation systems.
So I dug back into my old auto rigger and took a look at the scapular rig. Needless to say, there was not much going on, and what was there really, sorely needed improving.
After an afternoon of tweaking, testing and building I developed a solution.
(this is a GIF, you can click and watch it.)
This solution is based off the clavicle rotation, which is then multiplied or divided through a condition node network and used to drive the scapular bone.
A little time travel.
During August of 2006 I rendered this image:
At the time I felt it was the best I could achieve, I’d used all the tricks I had in my bag.
A physics based glass shader, global illumination, final gather and light caustics rendered with Mental Ray from 3DS Max.
I was pretty chuffed with the results!
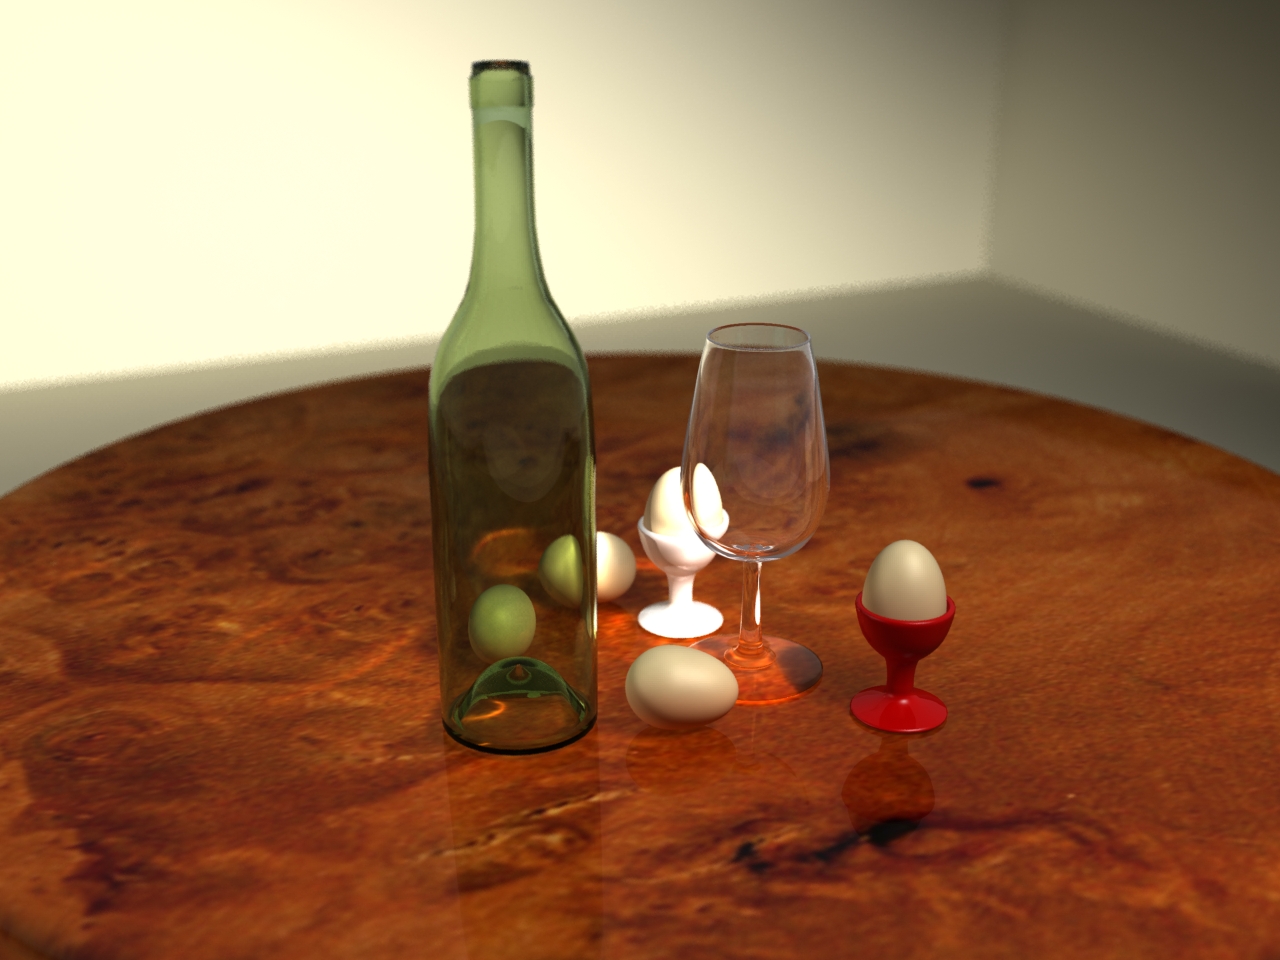
Recently I decided to come back to the concept, the rules were simple:
– use the same objects, 1 bottle, 1 glass, 5 eggs – two in cups all on a wooden table.
– use the same type of textures.
– I can adjust the camera angle and composition.
– I can use different rendering techniques or engines.
– Everything else stays the same, don’t add geo or effects
With this in mind I set out modelling the simple geo. I learned a few tricks to get good results creating poly geo from a nurbs curve, which perhaps I’ll go into another time.
Mental Ray was my choice as I’d used it in the past and am familiar with the concepts of Physically Based Rendering.
Initially I went about setting up some basic shaders then jumped into lighting, this proved to be slow, and at the advice of a friend I went back to setting up the shaders without lighting.
Once the basics were setup, the almost endless iteration began. Tweaking shaders and tweaking lighting, changing the environment and adjusting the HDR.
Finally I arrived at what I consider an end point, as we could all just keep tweaking until the cows come home.
After two weeks of work I have this image:

I learned a lot during this project and it was a fun return to some rendering, which I’ve not done for years.
..
…
….
But its not over yet!
Some of my co-workers use the Arnold Renderer and had been saying to me that I should tackle this project in Arnold.
Having started and made some progress in Mental Ray I chose to complete it. Once it was complete I couldn’t help but come back and have another shot.
So once again into the fray of shader setup and lighting. I used the exact same geo, lights and textures. The challenge was to reach the same result.
I’m very pleased to say the working with Arnold was fantastic! The renderer allows for really fast iteration of shaders and lighting.
The render view has some excellent features like rendering selected objects, fast IPR and customization of the UI elements.
To re-create the same scene and image only took two days!

I did find some interesting differences between Arnold and Mental Ray.
Arnold is lightning fast to work with, though I found it to have softer reflections, and the angel of the Fresnel reflections yields a different result.
The bottle glass shader was difficult to setup in each but with Arnold I had to resort to using a samplerInfo node to approximate the refraction through the volume of the glass.
Mental Ray’s reflections are fast and crisp, though its workflow is slow.
To wrap it all up I’ve assembled my work in progress renders into a time lapse and poster it on youtube.
Need for Speed!
After two years with EA – Firemonkeys, my team and myself are happy to launch Need For Speed: No Limits VR
During this project I was responsible for the character rigging, animation, animation planning and artist team tools!
The trailer is attached below but the 360 degree video works best on your phone. :)
Hiding Maya’s output wnidow
I’ve had enough of Maya’s output window, I know I’m not the only one.
Fortunately Autodesk have introduced a proces to hide the output window with Maya 2015+
This is done by setting the System Environment Variable: MAYA_NO_CONSOLE_WINDOW 1
and restarting your computer.
To implement this navigate to System Propities > Advanced > Environment Variables
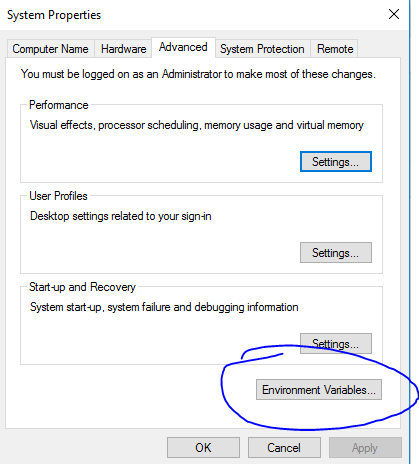
I get to this screen in Windows 10 by hitting start and typing “Environment Variables”
Once you’re in the Environment Variables screen, click New
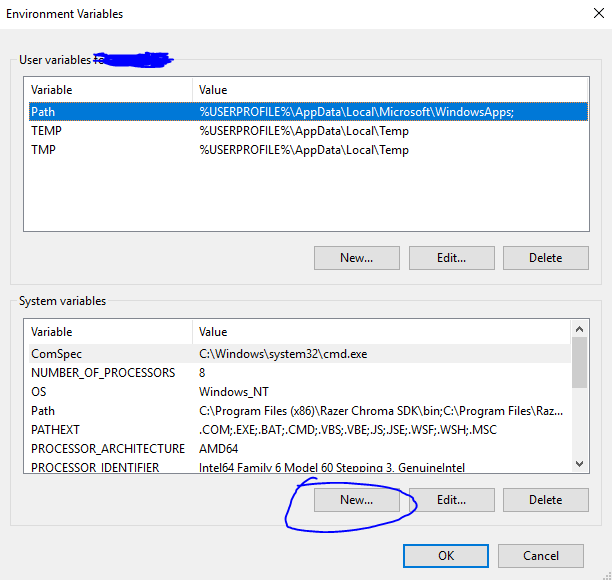
and create the variable “MAYA_NO_CONSOLE_WINDOW” (without the quotations) and set the value of this variable to 1.

once this is done, restart your computer.
Thats it, you should be done.
I’ve found this a much cleaner way to work, espically when opening scenes which have a lot of .tif textures to load.
The only issue I’ve found is that when done without restarting my computer, Maya no longer accessed the python interparator correctly.
Further more, when I was loading a plugin which was missing some components, the output window was useful to display this information.
Profiling code.
I’ve been wondering lately, when it comes to finding nodes in a scene, nodes which may or may no exist, which will be faster?
using a Try, Except?
or using maya’s built in objExists command?
My theory was that the Try, Except would be faster as objExists would have to loop over all nodes in the scene. At least as far as I assume.
So i put it to the test.
The first thing I neede ws a profiler. A little googling and I turned up Pyhtons Timeit module.
This can be imported using
import timeit

print timeit.timeit(function)
This will print the result of running the specified function one milling times. Its is run this many times to ensure consistency in the results.
That can be reduced by adding the number flag, to specify how many times the code is run, so:
import timeit

print timeit.timeit(function, number = 10000)
This will run the code ten thousand times. Its quicker and consistant enough for my requirements.
Getting into the problem at hand, I setup two functions, one as a Try, Except and another as objExists.
I ran each one in an empty scene and each one in a scene which included a complex character rig.
The code and results are below:
import maya.cmds as cmds
import timeit

def exists():
    found = cmds.objExists('locator1')
    return found

def select():
    found = False
    try:
        cmds.select('locator1')
        found = True
    except:
        found = False
    return found

print timeit.timeit(select, number = 10000)
The results
The Try, Except took:
0.398722180715 in an empty scene and
0.376243066404 in a complex rig scene
where as the objExists took
0.0698589508479 in an empty scene and
0.0415636909748 in a complex rig scene
astonishing, and, contrary to my expectations, the Try, Except took nearly ten fold longer than the objExists!
From this I learned: Using specific commands looks to be faster than using Try, Except! I’ll have to test more commands and find out :)
If you’d like to try this code yourself, you can see the result for each funstion by changing this line:
print timeit.timeit(select, number = 10000)
To this:
print timeit.timeit(exists, number = 10000)
Cheers!
Removing unknown nodes from your scene
I’ve recently found myself working in files with which
a co-worker has used a plugin which I don’t have.
Said plugin has created nodes which my version of Maya
does not recognize, so on load I get the classic error raised :
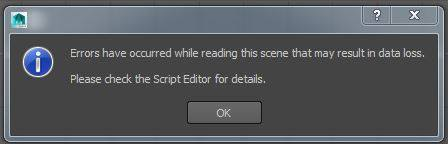
Through dealing with this I’ve developed a solution:
Find and delete said nodes!….. Brutal.
Now we can find these nodes using
import maya.cmds as cmds
unknownNodes = cmds.ls(type = 'unknown')
print unknownNodes
But if we try to delete them we get an error “#Error: Node is locked and cannot be deleted.”
so we need to unlock them with:
for node in unknownNodes:
    cmds.lockNode(node, lock = False)
then we can delete them with:
for node in unknownNodes:
    cmds.delete(node)
No bringing it all together in one script:
import maya.cmds as cmds
unknownNodes = cmds.ls(type = 'unknown')
for node in unknownNodes:
    print 'deleting: ' + node
    cmds.lockNode(node, lock = False)
    cmds.delete(node)
And there you have it! No longer shall you be plagued by errors on boot up :)
Its been a while..
I’ve been knuckled down with working full time! But its time to get back onto this blogging business.
Starting with revisiting an old tool feels appropriate!
Having written a tool for upsaving your scene some years ago
I’ve since learned a lot about string formatting and array navigation in Python.
The tool is simple, it finds out where your current scene is located and its name,
then looks for a number at the end of the name, adds 1 to it and saves the file, with the new name in
the same directory.
def upSaveScene():
	currentFileLocation = cmds.file( query = True, location = True )
	currentFileName = currentFileLocation.split( '/' )[-1]
	if '.mb' in currentFileName:
		stripExtension = currentFileName.replace('.mb','')
	if '.ma' in currentFileName:
		stripExtension = currentFileName.replace('.ma','')
	versionNumberString = stripExtension.split( '_' )[-1]
	if versionNumberString.isdigit():
		versionNumber = int(versionNumberString)
		newVersionNumber = versionNumber + 1
		newFilename = currentFileName.replace( str(versionNumber), str(newVersionNumber) )
	if not versionNumberString.isdigit():
		newFilename = stripExtension + '_01'
	newFilenamePath = currentFileLocation.replace( currentFileName, newFilename )

	cmds.file( rename = newFilenamePath )
	cmds.file( save = True, f = True )
Set project button!
Nice little tool which looks for you ‘scenes’ folder and sets the project to that location:
import maya.cmds as cmds
import maya.mel as mel
import maya.OpenMaya as om

def setProj():
    # find directory
    currentDir = cmds.file( query = True, location = True )
    # dicect directory and set project
    try:
        projectDir,garbage = currentDir.split( 'scenes' )
    except:
        return om.MGlobal.displayError( 'You need to have you file in a project folder structurte first' )
    mel.eval( 'setProject ' + '"' + projectDir + '"' )
    om.MGlobal.displayInfo( 'current project set to : ' + projectDir )
    del projectDir
    del garbage
setProj()